
Would you like to glue vinyl flooring? If so, then this article is for you. In it, I will show you how to glue vinyl flooring and give some tips on the process too. Glue vinyl flooring is a great option if you are looking for a durable type of material that can be installed quickly and easily in your home or business without breaking the bank. This makes glue vinyl flooring an excellent choice for renters who need something temporary until they buy their own place, homeowners who want to change up their decor with ease, or businesses that need a quick replacement solution when carpet wears out prematurely due to heavy traffic flow.
Step by step to Glue Vinyl Flooring
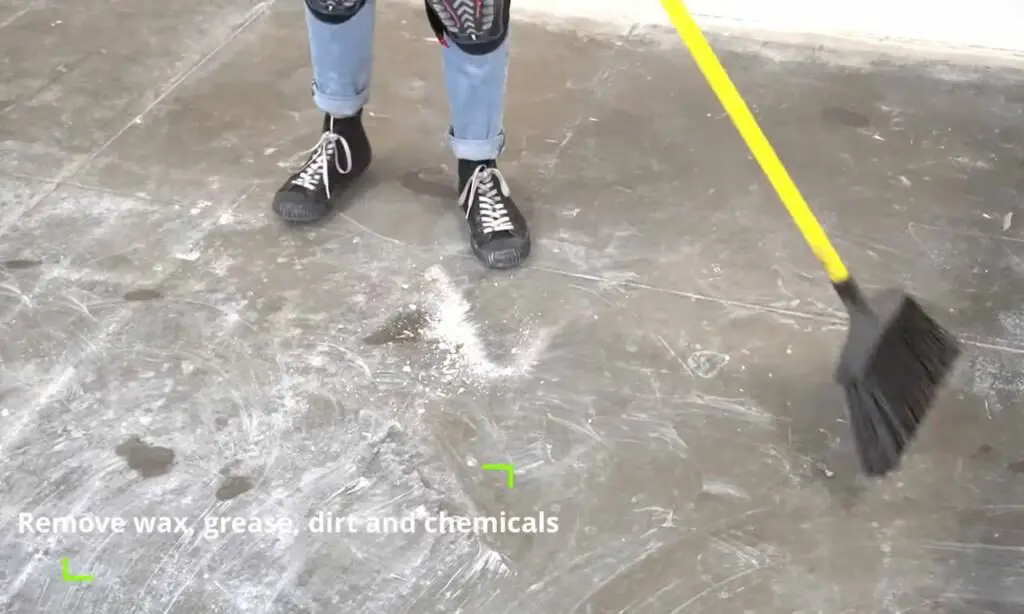
1. Clean and prepare the surface
Before glue vinyl flooring, you will need to make sure that the area is clean and free of dust or debris. You want a nice smooth surface for glue vinyl flooring so any bumps in uneven surfaces can cause it not to stick properly which leads to bubbles forming underneath. This means more work down the road when there are holes created by peeling up sections of glue vinyl flooring.
To prevent this from happening, you need to sand down the subfloor so it becomes smooth then sweep and vacuum the subfloor remove dust and dirt particles.
2. Prepare the adhesive and vinyl planks
The glue vinyl flooring adhesive is an important part of this process. You need to make sure that it will work on your subfloor type and the glue vinyl flooring you are using as well. For example, if you have a cement subfloor but are glue vinyl flooring with glue designed for plywood or hardwoods, then there’s a good chance the material won’t adhere properly which means bubbles in between each sheet of glue vinyl flooring down the road which leads to tears along seams when someone steps on them.
In addition, some types of adhesive must be mixed thoroughly before applying it to the subfloor, but others come premixed and ready to go. You can find glue vinyl flooring adhesive as a liquid or as an aerosol spray which is super convenient if you are working on your own with no assistance from others who could mix it for you in advance.
Therefore, follow any manufacturer instructions included with your glue vinyl flooring carefully so they can recommend whether their product works best with your floors or not and how to use it properly.
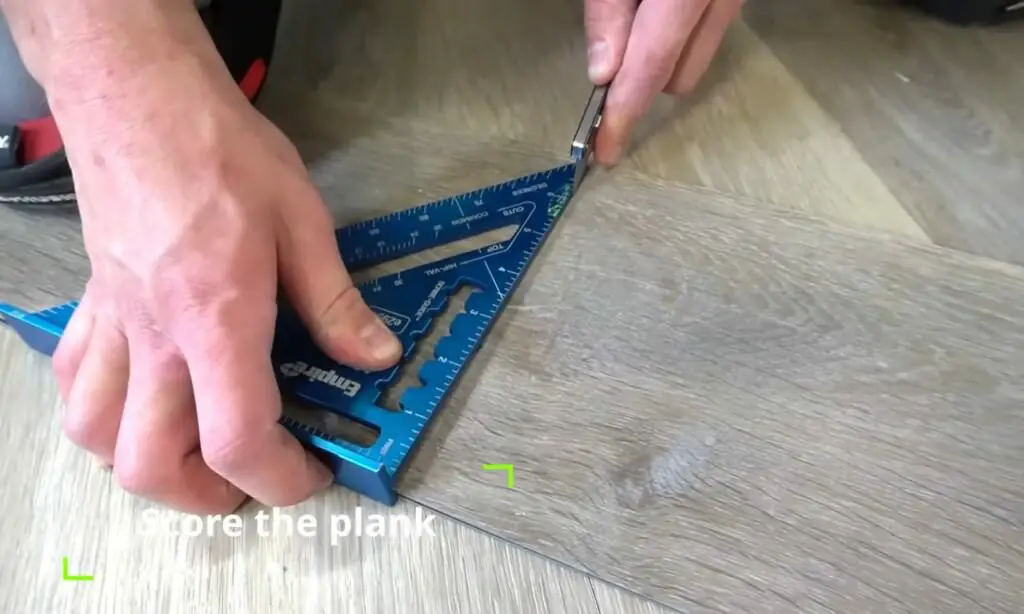
Before starting at gluing corners or gaps, you need to make sure that your plank is fitted with those areas. Measure out and cut the vinyl to the size and shape you need with a cutter like a utility knife or a tile cutter, make sure that the blade’s kept sharp for a clean cut.
3. Apply the adhesive onto the floor
It’s time to apply the glue onto the subfloor. You want an even coat for best results so use a trowel or paint roller with a long handle that reaches all areas of your room.
The glue needs about a few minutes to become tacky/sticky before applying glue vinyl planks on top too. So don’t touch any spots that are still wet because they’ll just stick together which is frustrating when trying to fit into place properly later down the road without bubbles in between each sheet of glue vinyl flooring!

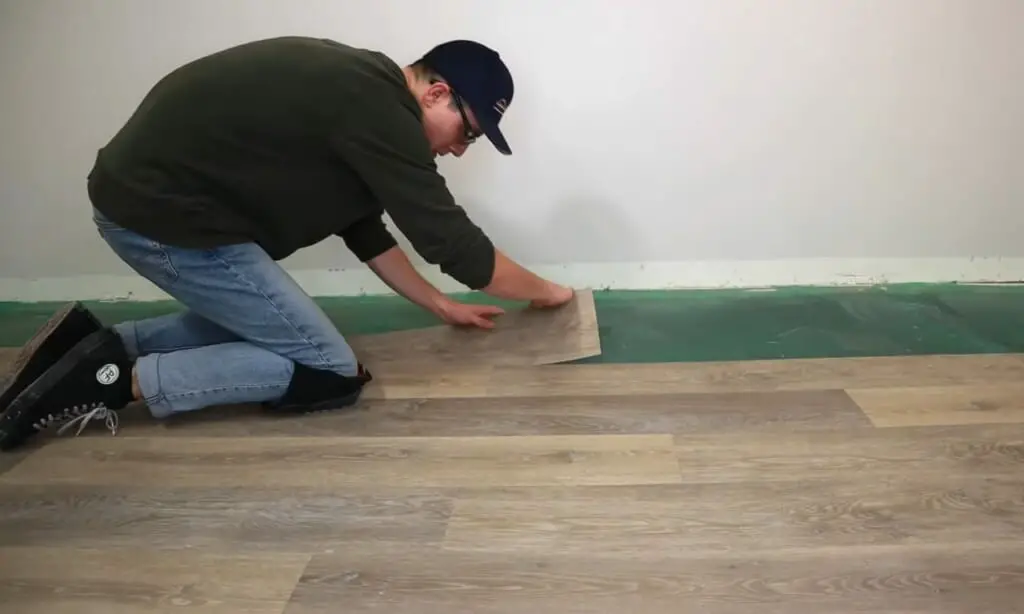
4. Put it in place and press firmly against the surface
Now that the adhesive is tacky/sticky, you can place your sheet of glue vinyl flooring on top. Make sure to align it properly with any seams or walls that are visible.
Press firmly all over the surface for best results and make sure there aren’t any air pockets underneath because this will create a bump that looks awful in high-traffic areas! Afterward, you can use a roller or your hands to press down even harder if needed because the moisture from the adhesive helps everything stick together tightly which prevents bubbles underneath!
5. Let dry for 24 hours before walking on it for safety reasons
Use a scraper to remove excess adhesive while it is still wet.
Then allow enough time for it all to dry according to manufacturer instructions before using any furniture again on tops like chairs and tables (usually around 24 hours depending on how thick/large your area is).
If there are small gaps after this process, you can fill them in with a vinyl flooring seam filler, but this is more of an advanced skill and isn’t necessary unless you really want your floors to look perfect for some reason.
Finally, sweep away excess pieces with a broom afterward such as dust or debris or anything else that could cause harm underfoot when someone walks over.
FAQs
Is glue down vinyl better than click?
Click vinyl is better in some ways, so it depends on what you are looking for.
Glue-down vinyl should be installed on an appropriately treated, level, dust-free floor. The vinyl really needs to be glued down because it’s much heavier than the click-type material.
Click is lightweight and can be installed over just about any hard surface including tile, laminate, or even high pile carpeting. Click requires only a “clicker” that acts as anchors for the installation of the product, glue is needed in order to adhere the pieces together to form the final flooring project.
The most important thing with clickable flooring is being able to change your mind without having to undo any work – just snap off the old pieces and install something new!
However, if you are looking to install a floor for heavy traffic or high-impact areas the glue-down vinyl is definitely needed.
You CANNOT install a floating floor over carpet.