
Glue porcelain? Sounds like a tricky job, right? Well, it’s not as hard as you think. In this article, we’ll go through everything you need to glue your porcelain securely and get the perfect glue job every time. We will discuss how to prepare the surfaces for gluing, what type of glue to use, and talk about some quick tips that will help too!
How to Glue Porcelain
1. Clean the surface and dry it thoroughly
Before you start gluing, make sure that the surfaces are clean and dry. Don’t use a rough cloth to get rid of dust from your surface because this can cause scratches on either side! A lint-free towel is ideal for drying off both sides after cleaning them properly.
Use hot water if necessary to completely remove any oil or dirt particles. Once everything has been cleaned and dried, you’re ready to begin gluing your pieces together!
2. Apply a thin layer of glue on your porcelain pieces
There are many different types of glue out there so choose the type of glue that works best for your project requirements.
- if your porcelain is in direct contact with food or drink, then ensure that gluing surface is food-safe by choosing an adhesive made specifically for this purpose like porcelain glue. This will make sure that your glue is food-safe and heat resistant (up to 300°F).
- If your porcelain will be used for decorative purposes only, then regular superglue will do the trick! Superglue dries thin and fast so it’s better for small projects. If you want a stronger bond, then look into using tile glue or epoxy resin glue which have similar properties to super glue. Epoxy is the best option if you need to fill small voids between parts, however it’s not good for small details. It also takes a long time to dry and becomes very rigid once it does, making your glue joint stronger but more inflexible so keep that in mind when using epoxy glue!
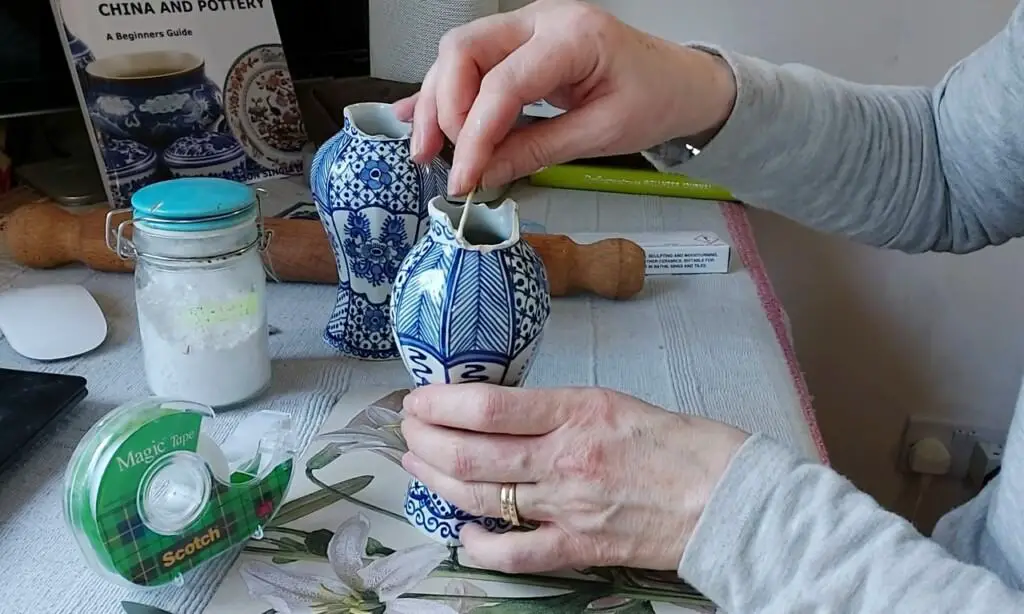
Once you have the best type of glue chosen, follow the instructions on the packaging to apply a thin layer on the back of both pieces being glued together. Some glue comes in glue applicators which dispense glue through a nozzle tip for easy application. However, if you don’t use this type of glue, you can use an old paintbrush, toothpick, or an old gift card if you don’t have anything else available to spread out the glue evenly. Try applying glue in small sections rather than doing everything at once because this can reduce chances for mistakes or miscalculations later on.
Also, keep an eye out for any air bubbles because they will always find their way into your most difficult spaces.
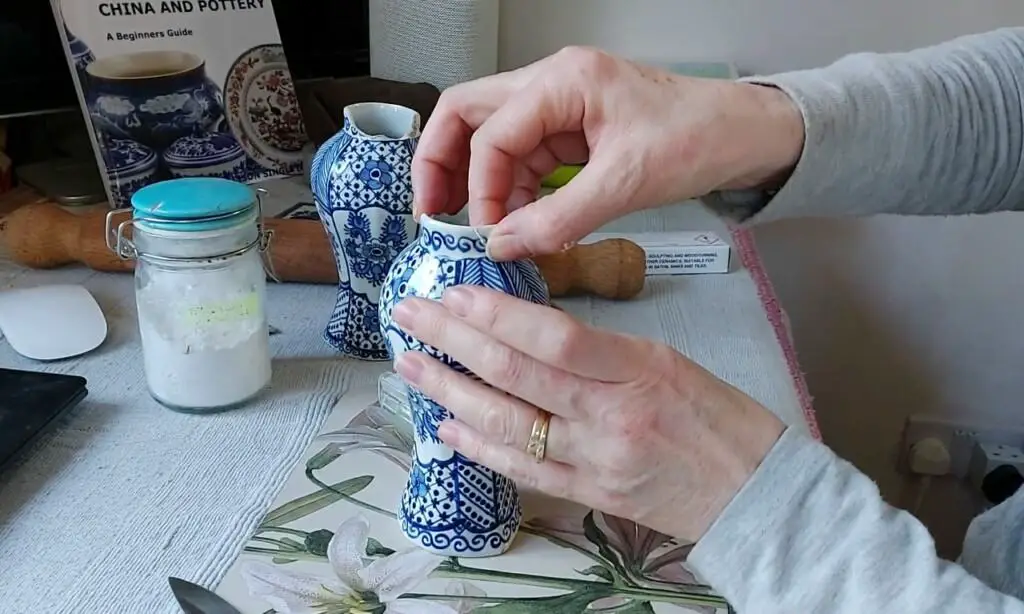
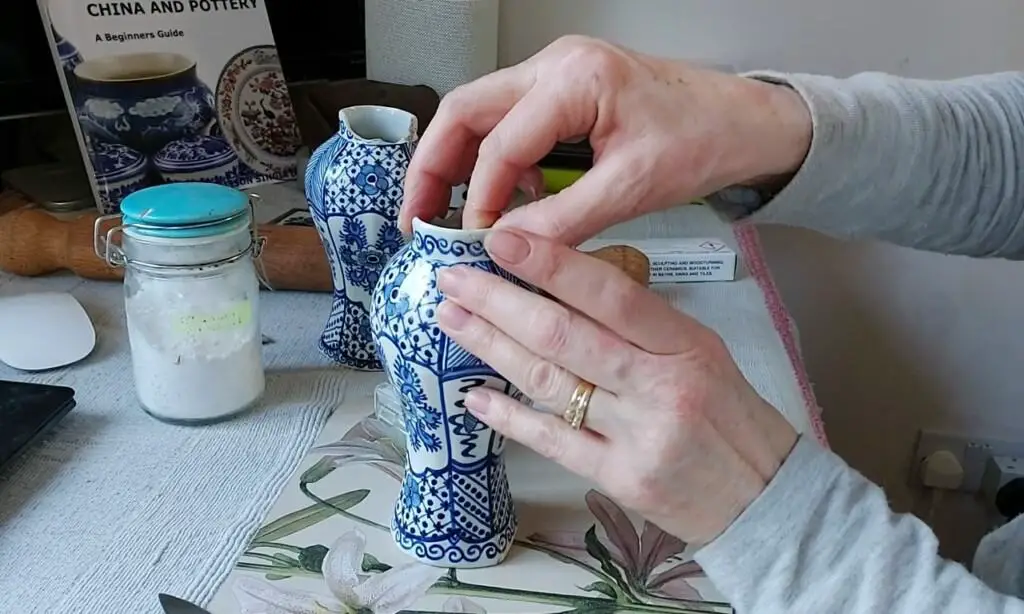
3. Gently press the pieces together until they are completely stuck together.
Gently push these towards one side with your fingertip, aligning it as closely as possible with its original location. Hold in place for 30 seconds before releasing pressure.
You may need to use a little bit more glue if there are gaps in between the two pieces or if they don’t fit perfectly together.
If you do happen to have any excess glue on the surfaces, you can try to rub the glue off gently with a damp cloth cotton swab if it hasn’t dried yet.
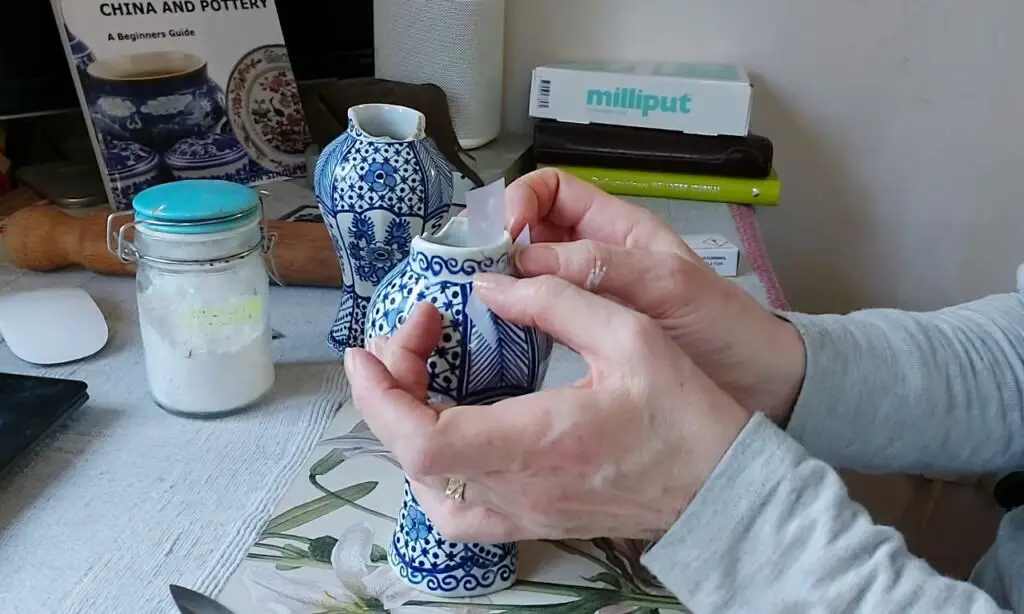
Tip: You can use a piece of tape to hold pieces in place while they dry.
4. Allow adhesive to dry before handling
Allow 24 hours for drying time before using your repaired item again! (this will allow time for the glue to fully set)
After everything has dried completely, you should test the strength of each bond by applying some pressure from either side with your hands – do this gently so that you won’t accidentally break anything!
If there’s still dried glue left over on either side after gluing, use rubbing alcohol to clean them off completely without damaging the underlying material. If done correctly, this will give your pieces an extremely stronghold.
Thanks to The China Repair Studio
FAQs
Does hot glue work on ceramic?
The answer to this is often dependent on the type of ceramic being repaired. In general, hot glue is ideal for porous ceramics because it creates a seal that provides strength and durability to cracks and chips. It can also work well with hard-finish ceramics as long as the piece is cleaned properly first so the adhesive has something to grip. On some pieces, hot glue will peel right off; on others, it will stay firmly in place and hold up well under regular use (to be expected with strong adhesives like hot glue). The bond will weaken over time and the piece will need to be re-glued after a while, so temporary is probably the best way to describe it.
Can you glue the porcelain toilet?
Yes, but precautions must be taken
Yes, you can glue a porcelain toilet. But it’s important to take precautions because if the adhesive doesn’t dry right away, it will cause major problems.
First of all, make sure you use a quality adhesive that is made for porcelain. Secondly, make sure the whole area is well-coated with adhesive and let it dry for at least 8 hours before using your toilet again. And lastly, cover up any holes or cracks with joint compound or caulking material before attaching fixtures onto your new porcelain surface so there are no leaks if things start moving around too much after installation.
Hopefully, these tips help!