Copper is very easy to bond together using various adhesives and sealants. Adhesives can also give structural strength even more incredible than welding.
However, not any adhesive can provide good results when you want to glue copper. At the same time, you also need to know how to properly glue copper pipes to ensure the desired strength and shape.
Our following article will guide you on how to glue copper pipes to achieve a lasting bond. Scroll down for detailed instructions!
Things You Will Need

You will need to gather the necessary things before you start.
Before starting work, you must prepare all the supplies and know valuable tips for gluing copper pipes.
It would be best if you choose a suitable adhesive, depending on your project.
Some bonds provide outstanding impact resistance, while others make the application and curing easier. The main types of bonds that you should use:
- Cyanoacrylate adhesives
- Anaerobic adhesives
- Epoxy resins
- Structural acrylic adhesives
You will probably need to prepare clamps to secure the parts you want to join so that the joints are as sealed as possible.
Attach the clamp as soon as you have applied the adhesive and assembled the pieces. You need to keep the clamps in place until the glue is completely cured.
Tools such as scrapers or rags should be prepared for cleaning excess adhesive.
However, it would help if you did not wait until the glue had solidified before washing, as you may need to apply heat to soften the adhesive.
Along with the adhesive, you may also need a sealant. Industrial adhesives can completely seal the part and are usually applied with a standard caulk gun.
Acrylic adhesive is also the material that helps your joints achieve the highest structural strength. Besides, if you need to glue copper to wood, plastic, or other materials, you will probably need super glue as well.
How to Glue Copper Pipe? A Detailed Guide

A guide to glue copper pipe.
Here is a detailed guide on how to glue copper pipes that you need to know:
Step 1: Cut Pipe
The first step is to cut all the pipes to the size you want.
Then, use a dedicated copper pipe cutter to make an excellent clean cut with a slight chamfer at the ends, so it fits snugly against the connectors.
However, it can take a long time to cut all the copper pipes, depending on the shape of the structure you can create.
Alternatively, you can use a circular or metal cutting saw, but they cannot guarantee a clean cut like a pipe cutter.
Step 2: Prepare Parts
After you have finished cutting all the parts, you need to arrange the parts and accessories in the structural shape you want.
This ensures everything is cut to the correct size and not missing any parts.
Step 3: Glue Up

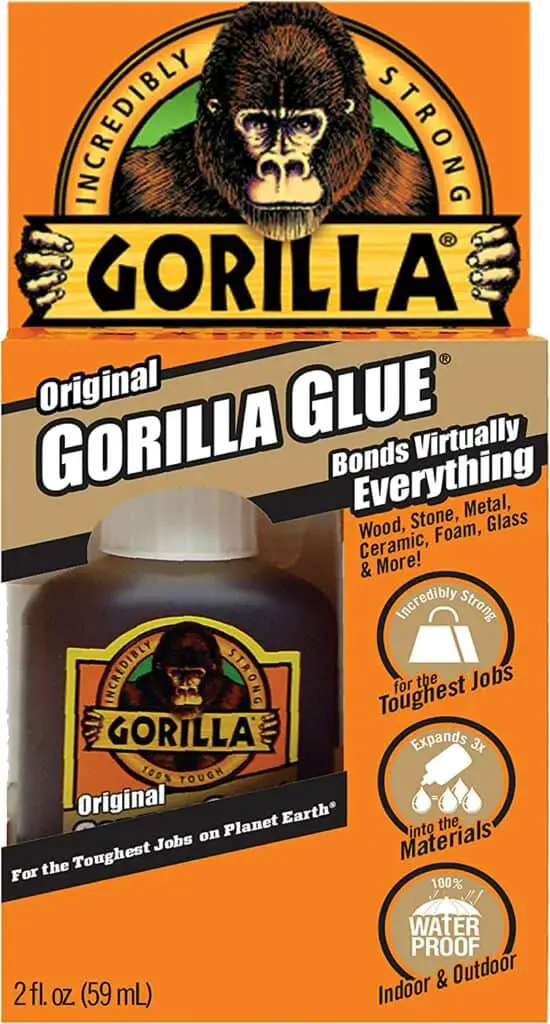
You can use Gorilla Original Glue to ensure the joints are tight.
After making sure everything fits, you will use special glue to stick it.
For example, you can use Gorilla Original Glue to keep the joints tight. Soldering copper pipes is the best, but it takes time and effort.
After the glue bubbles and expands so that the arc caps around the pipe are filled to ensure a tight connection, you need to fit all the parts together in about 15/20 minutes.
Don’t forget to wear gloves to prevent the glue from getting on your hands! You should also remove excess glue quickly before the glue hardens.
Step 4: Brasso
Once you’ve finished attaching the copper tubes, you can use some Brasso to clean it up and give your project a clean and shiny finish.
FAQs
1. What Glue Is Best for Copper?
For the copper tubes to be firmly bonded together, you can use Cyanoacrylate adhesives or a trendy adhesive to make the bonds stronger. The strongest bonds were made with methyl cyanoacrylates like the original Permabond 910.
2. What Methods Can Be Used to Join Hard Copper?
It will be better for hard copper to use welding, brazing, and resistance methods.
Welded joints and capillary fittings are commonly applied in plumbing for water lines and sanitary sewers.
3. Can You Epoxy Copper Pipe?

Superfast Copper Epoxy Putty is safe to use with potable water.
You can completely use epoxy to repair copper pipes, the most popular being Superfast Copper Epoxy.
This epoxy helps plumbing and industrial facilities limit leaks. Also, Superfast Copper Epoxy Putty is safe to use with potable water, approved by WRAS.
4. What Can I Use to Seal a Leaking Copper Pipe?
You can use epoxy putty to repair the copper pipes when they leak. Epoxy putty is made up of two main components, including resin and hardener.
When mixed well, these ingredients form a material that can be used to seal openings before they solidify into a hard material.
5. What Is the Best Sealant for Copper Pipes?
The best sealants for copper pipes are those that contain silicone ingredients.
It can be used to seal gaps between your pipes and walls. Be aware, however, that they can only work effectively on small cracks less than 1/4 inch in size.
6. Does Silicone Work on Copper?
Silicone can not only be used to repair copper pipes but also can remove oxygen from copper pipes when machined.
Deoxidation is required when a suitable metal alloy, such as copper, is liquid without affecting its tensile strength or making it brittle.
Conclusion
All the information in the article can help you grasp how to glue copper pipe to achieve lasting bonds for crafting, DIY, and copper pipe projects.
Overall, this job is not difficult; it just requires you to focus and be meticulous.
At the same time, you are also careful not to get glue on your hands or eyes while working because it can affect your health.
Hopefully, this article will bring you helpful information.
Thanks for your attention!
